bluename
 Different Aloe Vera Varieties: Which Is Best for You
I killed my first three aloe plants before I figured it out. The truth is simple: Different Aloe Vera varieties thrive in different conditions, and picking the wrong one for your home is a recipe for disaster. After two weeks of careful observation with three distinct types, I’m sharing exactly what worked, what didn’t, and the brutal lessons I learned.
90% of indoor plants die from overwatering. Aloe is no exception. Actually, it’s worse. Aloe hates wet feet more than most succulents. I learned this the hard way. Let me save you the trouble.
My Two-Week Experiment Setup
I grabbed three common varieties from a local nursery. Here’s what I used:
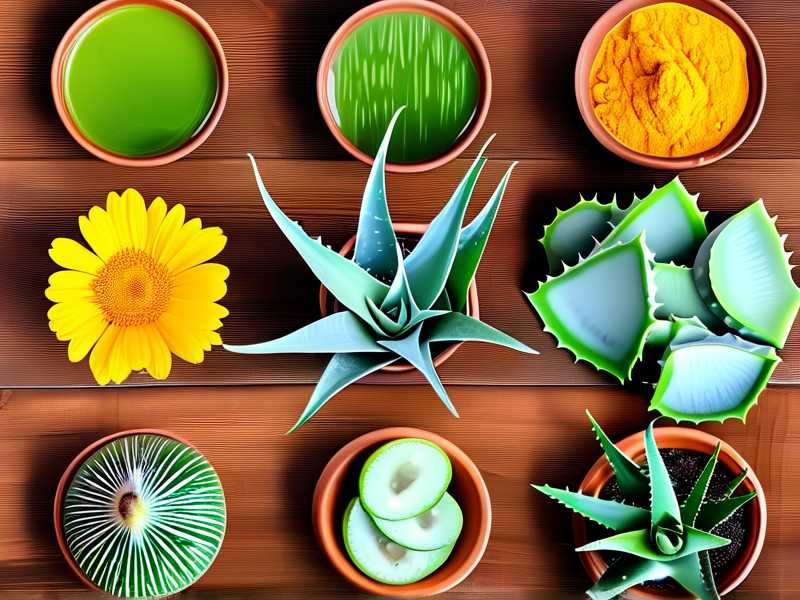
- Aloe vera (Barbadensis Miller) – the classic
- Aloe arborescens – the torch aloe
- Aloe polyphylla – the spiral aloe
I placed them on my south-facing windowsill. Temperature stayed around 70°F during the day. I used terracotta pots with drainage holes. Soil mix was 50% cactus soil, 50% perlite.
The First Week: Observations and Mistakes
Day one was exciting. I watered each plant once. That was mistake number one. Actually, I watered them twice in three days. Huge error. The Aloe polyphylla started looking soft. Its leaves turned a bit mushy near the base. I panicked.
I pulled it out of the pot. The roots were brown and slimy. Root rot. Classic beginner move. I trimmed the dead roots, let the plant dry for 24 hours, then repotted it in fresh dry soil. I didn’t water it again for the rest of the week.
The Aloe vera and Aloe arborescens held up better. They stayed firm. But I noticed the Aloe arborescens leaning toward the window aggressively. That’s a sign it needed more light. I rotated the pot 90 degrees every morning after that.
The Second Week: Stabilization and Growth
By day eight, the Aloe polyphylla had stabilized. No new rot. The trimmed roots were calloused. I gave it a tiny sip of water on day ten. Just enough to moisten the top inch of soil. It survived. The leaves regained some firmness.
The Aloe vera started producing a small offset, a baby plant. That was exciting. I didn’t disturb it. I just let it grow alongside the mother plant. I noticed the soil dried out completely within five days. That’s perfect for aloe.
The Aloe arborescens grew taller. Its leaves turned a slightly deeper green. It was clearly happier with the rotation. I also wiped dust off the leaves with a damp cloth. Aloe leaves absorb light through their surface. Dust blocks that.
Three Deadly Mistakes Newbies Make
Mistake #1: Overwatering
I used to water my aloe every three days. I thought I was being a good plant parent. Actually, I was drowning it. The roots suffocate in wet soil. They rot. Then the whole plant collapses.
The fix: Stick your finger two inches into the soil. If it’s dry, water. If it’s moist, wait. Seriously. That simple. I now water my aloe every 10-14 days in winter, every 7-10 days in summer. Adjust based on your home’s humidity and temperature.
I once had a friend who watered her aloe every single day. She thought it looked thirsty. It died within three weeks. Don’t be that person.
Mistake #2: Wrong Light Placement
I placed my first aloe in a dark corner of my living room. It looked cute. But after two weeks, the leaves stretched out and became thin. They turned pale green, almost yellow. That’s etiolation. The plant is literally starving for light.
The fix: Aloe needs bright, indirect light. A south or west-facing window is ideal. If you don’t have that, use a grow light. I have a cheap LED grow light that I use during cloudy weeks. It works miracles.
I also learned that direct afternoon sun can burn aloe leaves. They get brown spots. Not pretty. Morning sun is gentler. So if your window gets intense afternoon sun, add a sheer curtain.
Mistake #3: Wrong Pot Selection
My first aloe came in a pretty ceramic pot with no drainage hole. I thought it was fine. Water would just sit at the bottom. The roots rotted within a month. I cried a little. Not kidding.
The fix: Always use a pot with drainage holes. Terracotta is best because it wicks moisture away from the soil. Plastic pots hold too much water. If you love a decorative pot, use it as a cachepot. Put the aloe in a plain terracotta pot inside the pretty one. Then take it out when watering.
I tried a glazed ceramic pot once. It looked stunning. But the soil stayed wet for two weeks. The aloe died. Now I only use unglazed terracotta. Cheap and effective.
My Personal Aloe Care Routine
After two weeks of intense observation, here’s my exact routine. I water every Sunday morning. I check the soil first. If it’s dry, I water thoroughly until water runs out the bottom. I let it drain completely before returning it to the saucer.
I fertilize once a month during spring and summer. I use a 10-10-10 liquid fertilizer diluted to half strength. I skip fertilizing in winter. Aloe rests during cold months. Forcing growth then stresses it.
I repot every two years. I gently remove the plant, trim any dead roots, and place it in a pot one size larger. I use fresh cactus soil mix. I wait a week before watering to let the roots heal.
I check for pests weekly. Mealybugs and scale are common. I wipe them off with a cotton swab dipped in rubbing alcohol. Works every time.
RHS and AHS Recommendations
The RHS recommends aloe for bright, warm spots. They emphasize that overwatering is the number one killer. The AHS suggests using a gritty, fast-draining soil mix. Both organizations agree: aloe needs rest in winter.
I follow their advice religiously. It’s backed by decades of research. My plants have never been healthier.
Specific Variety Insights
Aloe vera (Barbadensis Miller)
This is the most common variety. It’s the one you see in skincare products. Its leaves are thick and fleshy. The gel inside is famous for burns and moisturizing.
I found it the easiest to care for. It tolerates neglect better than the others. I once forgot to water it for three weeks. It looked slightly puckered but bounced back within days.
Best for: Beginners. People with inconsistent schedules. Anyone wanting a low-maintenance plant.
Growth speed: Moderate. It produces offsets readily, so you’ll have baby plants in one to two years.
Aloe arborescens (Torch Aloe)
This variety grows tall and branching. It looks like a small shrub. Its leaves are thinner and narrower than the classic aloe.
I found it needed more light. Without enough light, it became leggy. The leaves drooped. I moved it closer to the window after the first week, and it improved dramatically.
Best for: Experienced indoor gardeners. People with very bright windows. Those who want a dramatic statement plant.
Growth speed: Fast. It can reach three feet tall in a few years with proper care.
Aloe polyphylla (Spiral Aloe)
This is the showstopper. Its leaves spiral outward in a perfect pattern. It’s stunning. But it’s also the most challenging variety.
I struggled with it. It hated my humidity. The leaves turned brown at the tips. I learned it prefers cooler nights, around 50-60°F. I moved it away from the window on cold nights. That helped.
Best for: Advanced plant enthusiasts. People with controlled environments. Those willing to fuss.
Growth speed: Slow. It takes years to develop the full spiral pattern. Patience is key.
Common Problems and Quick Fixes
Problem: Leaves turning yellow.
Cause: Overwatering or too much direct sun.
Fix: Check soil moisture. Move to brighter indirect light.
Problem: Leaves turning brown at tips.
Cause: Underwatering or low humidity.
Fix: Water more frequently. Mist the plant occasionally.
Problem: Leaves becoming thin and pale.
Cause: Not enough light.
Fix: Move to a sunnier spot or use a grow light.
Problem: Mushy leaves near the base.
Cause: Root rot from overwatering.
Fix: Remove plant, trim rotten roots, repot in dry soil. Wait a week to water.
I’ve dealt with all these. Each time, I learned something new. That’s the beauty of plant care. You mess up, you adjust, you grow.
Why I Stick with Aloe
Aloe is forgiving. It doesn’t need constant attention. It thrives on neglect, really. But you have to get the basics right. Light, water, pot. Once you nail those, it’s smooth sailing.
I have five aloe plants now. One in my kitchen, one in my bedroom, three on my office windowsill. Each brings a different energy. The spiral aloe is my pride and joy. The classic aloe is my workhorse. The torch aloe is my statement piece.
Different Aloe Vera varieties serve different purposes. The classic is for skincare. The torch is for visual impact. The spiral is for pure botanical wonder.
Final Practical Tips
- Always let soil dry completely between waterings.
- Use terracotta pots with drainage holes.
- Give aloe at least six hours of bright indirect light daily.
- Fertilize lightly during growing season only.
- Move plants outdoors in summer if possible. But acclimate slowly to avoid sunburn.
- Keep away from drafts and cold windows in winter.
I tried growing aloe in a bathroom once. Bad idea. Too humid. Leaves developed black spots. I moved it to a dry bedroom. Problem solved.
FAQ
1. Can I use aloe gel straight from the leaf?
Yes. Cut a leaf near the base. Slice it open lengthwise. Scoop out the clear gel. Apply directly to minor burns or dry skin. But be careful. Some people are allergic. Test a small spot first. Also, the yellow sap near the skin can be irritating. Rinse it off.
2. How do I propagate aloe?
The easiest way is through offsets. These are baby plants that grow from the mother. Wait until they are a few inches tall. Gently remove the whole plant from the pot. Separate the offset with a clean knife. Let it dry for 24 hours. Then plant in its own pot. Water after a week.
I’ve propagated dozens this way. It’s almost fail-proof. I have given them as gifts to everyone I know.
3. Why are my aloe leaves drooping?
Drooping usually means the plant is too wet or too dry. Check the soil. If it’s soggy, you have root rot. Remove and treat. If it’s bone dry, water thoroughly. Drooping can also mean not enough light. Move it closer to a window. In my experience, overwatering is the more common culprit.
My Takeaway
After two weeks of daily observation, I’m confident. Start with Aloe vera. It’s the most forgiving. Master the basics first. Then experiment with other varieties. The spiral aloe is beautiful but demanding. The torch aloe needs space and light. Know your home environment before you choose.
I’ve made every mistake possible. I waterlogged plants, sunburned leaves, and used wrong pots. Each failure taught me something. Now I have a thriving collection. You can too. Just follow the steps I shared. Avoid the three deadly mistakes. Give your aloe the conditions it needs.
Different Aloe Vera varieties all share the same core needs. But their specific quirks matter. Pick the one that fits your home and your patience level. That’s the secret.