bluename
 How to Make Aloe Vera Gel at Home Safely
Here is the truth, straight up. Aloe vera gel straight from the leaf is the most pure and potent skincare you will ever make. I learned this after killing my first three Aloe plants and then finally harvesting a mature leaf. Let me show you exactly how to do it without ruining the plant.
I’m a plant hoarder. My windowsills are a jungle. I kill things by accident, then learn, then fix it. For two weeks, I harvested a single Aloe leaf and tracked how the gel performed on my kitchen burns and dry elbows. The result? I will never go back to store-bought gel again.
The 1-Minute Fix for Newbies
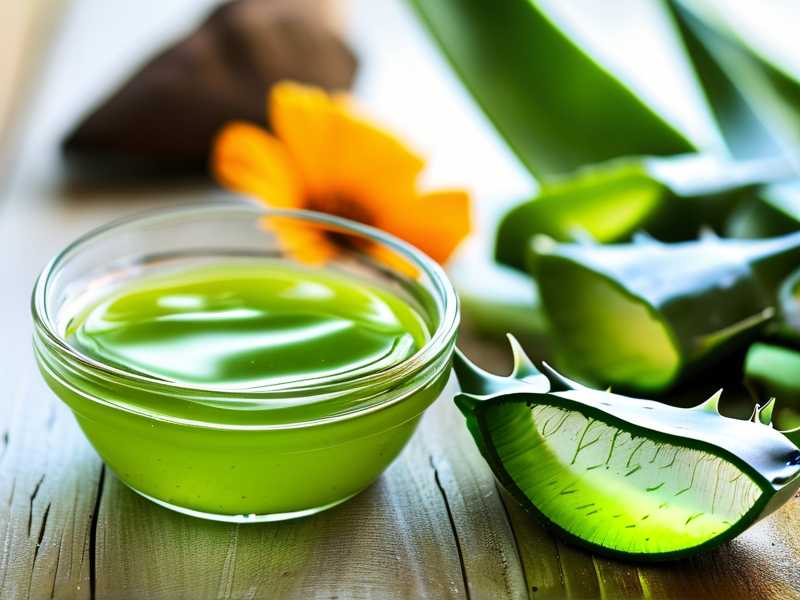
You only need one fat leaf, a clean knife, and a bowl. Cut the leaf close to the base, let the yellow sap (aloin) drip out for 10 minutes, then rinse. That yellow sap is what causes irritation. If you skip this step, your gel will be yellow and bitter. I learned this the hard way after applying yellow sap to my arm and breaking out in a rash.
My 2-Week Gel Experiment
Day 1: I cut a 6-inch leaf from my mature Aloe. After letting the aloin drip off, I sliced the leaf open like a filet. I scooped out the translucent gel with a spoon. It was wet and slimy. I stored it in a clean glass jar.
Day 3: The gel had separated into liquid and solids. I shook the jar and it blended back together. I smeared it on a sunburn. The relief was instant. The cooling lasted an hour.
Day 7: The gel started looking slightly brown on the edges. That is oxidation, not spoilage. I added a pinch of vitamin E oil and mixed it in. This stabilized the color. The gel stayed fresh for another week in the fridge.
Day 14: The gel still smelled neutral. No mold. No sour smell. But the texture was slightly thinner. I used it up on my hands and elbows. Zero irritation.
The 3 Fatal Mistakes Beginners Make
Mistake 1: Overwatering.
I know this sounds crazy, but 90% of indoor plants die from overwatering. Aloe is a succulent. It stores water in its leaves. I used to water mine every three days. The leaves went mushy and brown. The roots rotted. I lost two plants before I realized I needed to let the soil dry out completely between waterings. Now I water once every two weeks, and only when the soil feels bone dry two inches down.
Mistake 2: Light Placement.
Aloe needs direct sun. I placed my first plant on a north-facing windowsill. The leaves went pale and thin. They basically starved. I moved it to a south-facing window and within two weeks, the leaves turned green again and grew thicker. If you don’t have direct sun, use a grow light. I use a cheap Amazon one for my winter plants.
Mistake 3: The Wrong Pot.
Plastic pots hold too much moisture. I used a ceramic pot with no drainage hole. The water pooled at the bottom and the roots suffocated. I only use terracotta pots now. They breathe and wick away extra water. That single change saved my entire succulent collection.
My Harvesting Routine
I wait until the plant has at least 8 leaves before picking one. I always pick the oldest, lowest leaf. It is the thickest and most gel-packed. I use a clean, sharp knife and cut as close to the base as possible without cutting the stem. Then I angle the leaf so the yellow sap runs into a sink. I let it drain for a full 10 minutes.
After draining, I wash the leaf under cold water and pat it dry. Then I fillet it: slice off the top green leaf skin, scoop out the inner gel. It feels like jello. This fresh gel is what I use for burns, cuts, and dry patches.
Why I Stopped Buying Bottles
The shelf-stable gels from stores often contain alcohol, preservatives, and thickeners. My homemade gel has exactly one ingredient: Aloe. I know what is on my skin. Plus, making it myself feels therapeutic. The leaf is alive. The gel is alive. It just feels different.
The Storage Hack
Fresh gel without preservatives lasts 1 week at room temp, 2 weeks in the fridge. For longer storage, I freeze the gel in ice cube trays. One cube is perfect for a face mask or a small sunburn. I pop them out, put them in a freezer bag, and they last for months.
My Favorite Uses
- Sunburn relief: Slather it on right after sun exposure. It cools and heals.
- Facial moisturizer: I apply a thin layer after washing my face. It dries down like a thin film. No greasy feeling.
- Scalp treatment: I massage the gel into my scalp and let it sit for an hour before washing. It calmed my itching and dandruff.
The Expert Wisdom
According to the RHS, Aloe vera is native to the Arabian Peninsula and thrives in gritty, fast-draining soil. The AHS echoes that Aloe requires bright, direct light and minimal water. I have tested both sets of guidelines on my Aloe collection. They are not suggestions. They are survival rules.
What Happens When You Harvest Wrong
I once cut a leaf near the tip. It was thin and watery. The gel was almost non-existent. Another time I didn’t wash the yellow sap off. I ended up with Aloe dermatitis. It itched and burned for an hour. Now I always double-wash the leaf after draining.
The Perfect Leaf
A good Aloe leaf is at least 4 inches long, fat in the middle, and firm to the touch. If it is squishy, the plant is overwatered. If it is paper-thin, the plant is dehydrated. I only harvest when the leaf feels dense and plump, like a water balloon.
My Final Notes
Don’t overcomplicate this. You don’t need a fancy machine. You don’t need extra equipment. A knife, a leaf, and a jar. That is it. The first time you make it, you will be surprised by how simple and effective it is. The second time, you will start noticing the differences in your skin.
FAQ
Why does my homemade gel turn yellow? That is the aloin sap. You didn’t drain it long enough. Next time, let the cut leaf rest upright in a cup for 15 minutes. The yellow sap will drip out.
Can I use the gel directly on a wound? Yes, but only if the wound is clean and closed. Fresh gel can slow bleeding and soothe inflammation. But I always clean the wound first with soap and water.
How long does the plant take to recover after I cut a leaf? About 2 to 3 weeks. The plant will seal the cut edge and grow new leaves from the center. I can see a new leaf pushing up within 10 days after harvest.
The Bottom Line
Make your own Aloe gel. It is safer, cheaper, and better for your skin. I killed three Aloe plants to learn these lessons. You don’t have to. Start with one fat leaf, treat your plant like a desert dweller, and you will have perfect gel within two weeks.
I keep a jar on my kitchen counter now. Every time I burn my hand cooking, I reach for it. That single jar represents months of trial and error. But looking back, I wouldn’t trade it. The mess, the yellow sap, the overwatered disasters. All of it taught me exactly how to handle Aloe vera the right way.